
Bias tape! It's a lot. We understand bias can be overwhelming, so we pooled some of our favorite tricks and tips together to hopefully make it easier for you. We recommend trying some of these out to help you along the way when tackling bias binding on the Liz Quilted Liner Jacket.
When it comes to bias, you can buy it premade in packages from the fabric store. It usually comes in solid colors, but sometimes you can find fun prints through retailers on Etsy. If you're interested in making your own to coordinate with your project you can use 1" bias tape maker to help you iron it into place.
If you prefer to forego the bias tape maker we have a simple technique that will get you beautiful bias without the extra tool. Continue reading for the scoop on glue basting and a helpful trick for getting the perfect join for continual bias binding.
Cutting
Using a clear acrylic quilting ruler align the 45° angle line with the selvage. Then mark or cut your first line.


Using this edge as a guide cut your fabric into 2 1/2" (6.35 cm) strips. This technique requires wider strips than if you were using a bias tape maker and may require additional yardage than the pattern lists.


Seaming
Square off the tips of your fabric strips to prep for joining.

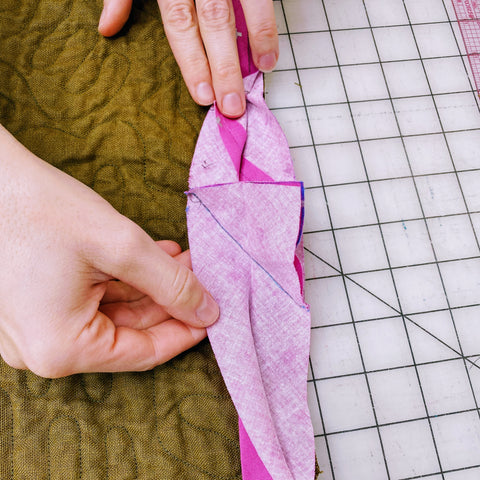
Join your bias strips together at a 45° angle. This will help distribute the seam allowance to reduce bulk. To do so, align the fabric strips perpendicular with the right sides together.

Mark your seam line. Using a ruler and marking tool draw a line from the top left corner to the bottom right corner where the two strips intersect. Pin along the marked line to help keep your join clean and accurate.


Stitch directly on the marked line. Remember to snip your threads as you go.

Trim seam allowance to 1/4" (6mm).

Press seam open.


Repeat for remaining strips until you have a long strip of bias tape.
Pressing
Once your binding has been pieced you will press the strip in half lengthwise, matching up the raw edges with wrong sides together.


Attaching the binding
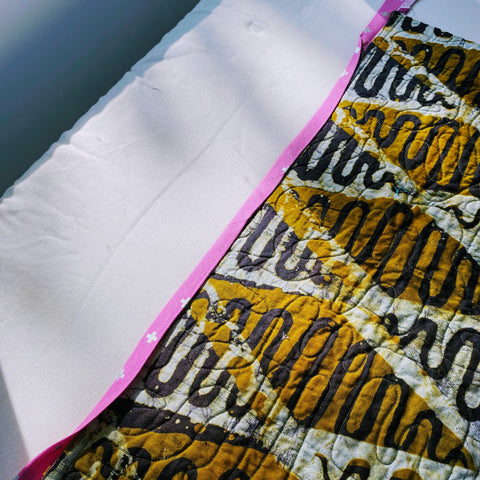
Align the raw edges of the binding with the right side of your quilt or quilted garment edge.


Using a scant 3/8" (10mm) seam allowance stitch the binding in place.

First press the binding up towards the raw edge so the seam is flat.


Then wrap the binding over the edge to the wrong side of the quilt and press.


Finish attaching the binding by edgestitching it down on the opposite side.

Glue Basting
If you are struggling to keep your binding in place for top stitching try glue basting! Using a water soluble glue you can temporarily hold your binding in place without pins or clips getting in your way. The glue should not gunk up your needle or add any additional bulk and since it is water soluble it will wash away once you launder your garment.

Most water soluble glues will work for this but here are a few we have used and like:
- Roxanne's Glue Baste It - has a small tip for precision application
- Sewline Fabric Glue Pen - applies blue and dries clear for better visibility when applying.
- Elmers School Glue - can be used in stick or liquid form and is very easy to source.
- Dritz Fabric Glue Stick - easy to use!
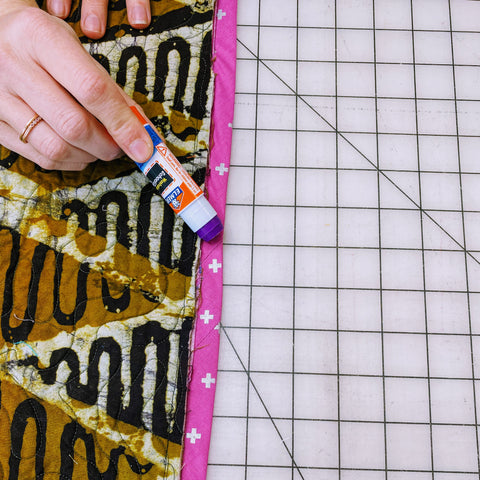
To glue baste your binding place small dots of liquid glue or a thin line from a glue stick onto your exposed seam allowance or wrong side of binding edge.

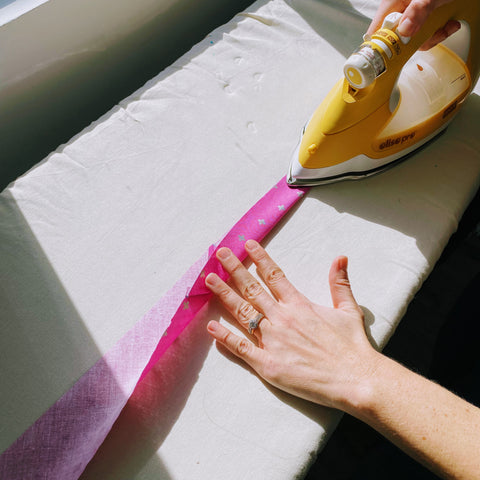
Fold binding into place and press with a hot iron. The heat from the iron will set the glue in place. Your binding is now secure and is ready to be top stitched or hand stitched in place.

If you need to reposition simply peel the edge back and glue into place again. As this is a temporary adhesive it is very easy to remove and reapply.
Closing Your Binding
This trick will take the guesswork out of determining where to cut your two ends to join your binding together on a garment or quilt. This method works for quilt binding of all widths to create a flat join.
Lay your quilt on your work surface with the attached binding face up.

First, trim the binding on your left hand side at a 90°. Make your cut anywhere in the center of the opening you have left for attaching the binding. Then lay binding flat along edge.


Place the strip of binding you just cut off vertically aligned with the cut edge of the binding. Then, measure 1" past the width of the binding.


Place the binding strip from the right side over the first strip. Then mark and trim the overlapped bias at the measured edge.


Seam pieces together on a 45° angle and trim seam allowance (as shown in previous steps).


Your binding should now be closed and laying flat and aligned with the edge of your quilt, ready to be stitched in place.

The formula to remember for this technique is "width of folded binding + 1 inch" as it can be used for binding of all widths.
We hope you found these tips helpful!
Laisser un commentaire